Salesforce Data Source Setup
We're in the process of improving this guide and expect a little bit of back and forth as we make sure it's right for all Salesforce versions. Any feedback you might have would be sincerely appreciated.
Initial setup & authentication
Quick steps:
- Confirm Company name
- Candu issues certificate
- Integration Profile Setup
- Integration User Setup
- Client App Setup
- Candu sets up your sync
- Confirm mapped fields and Enable
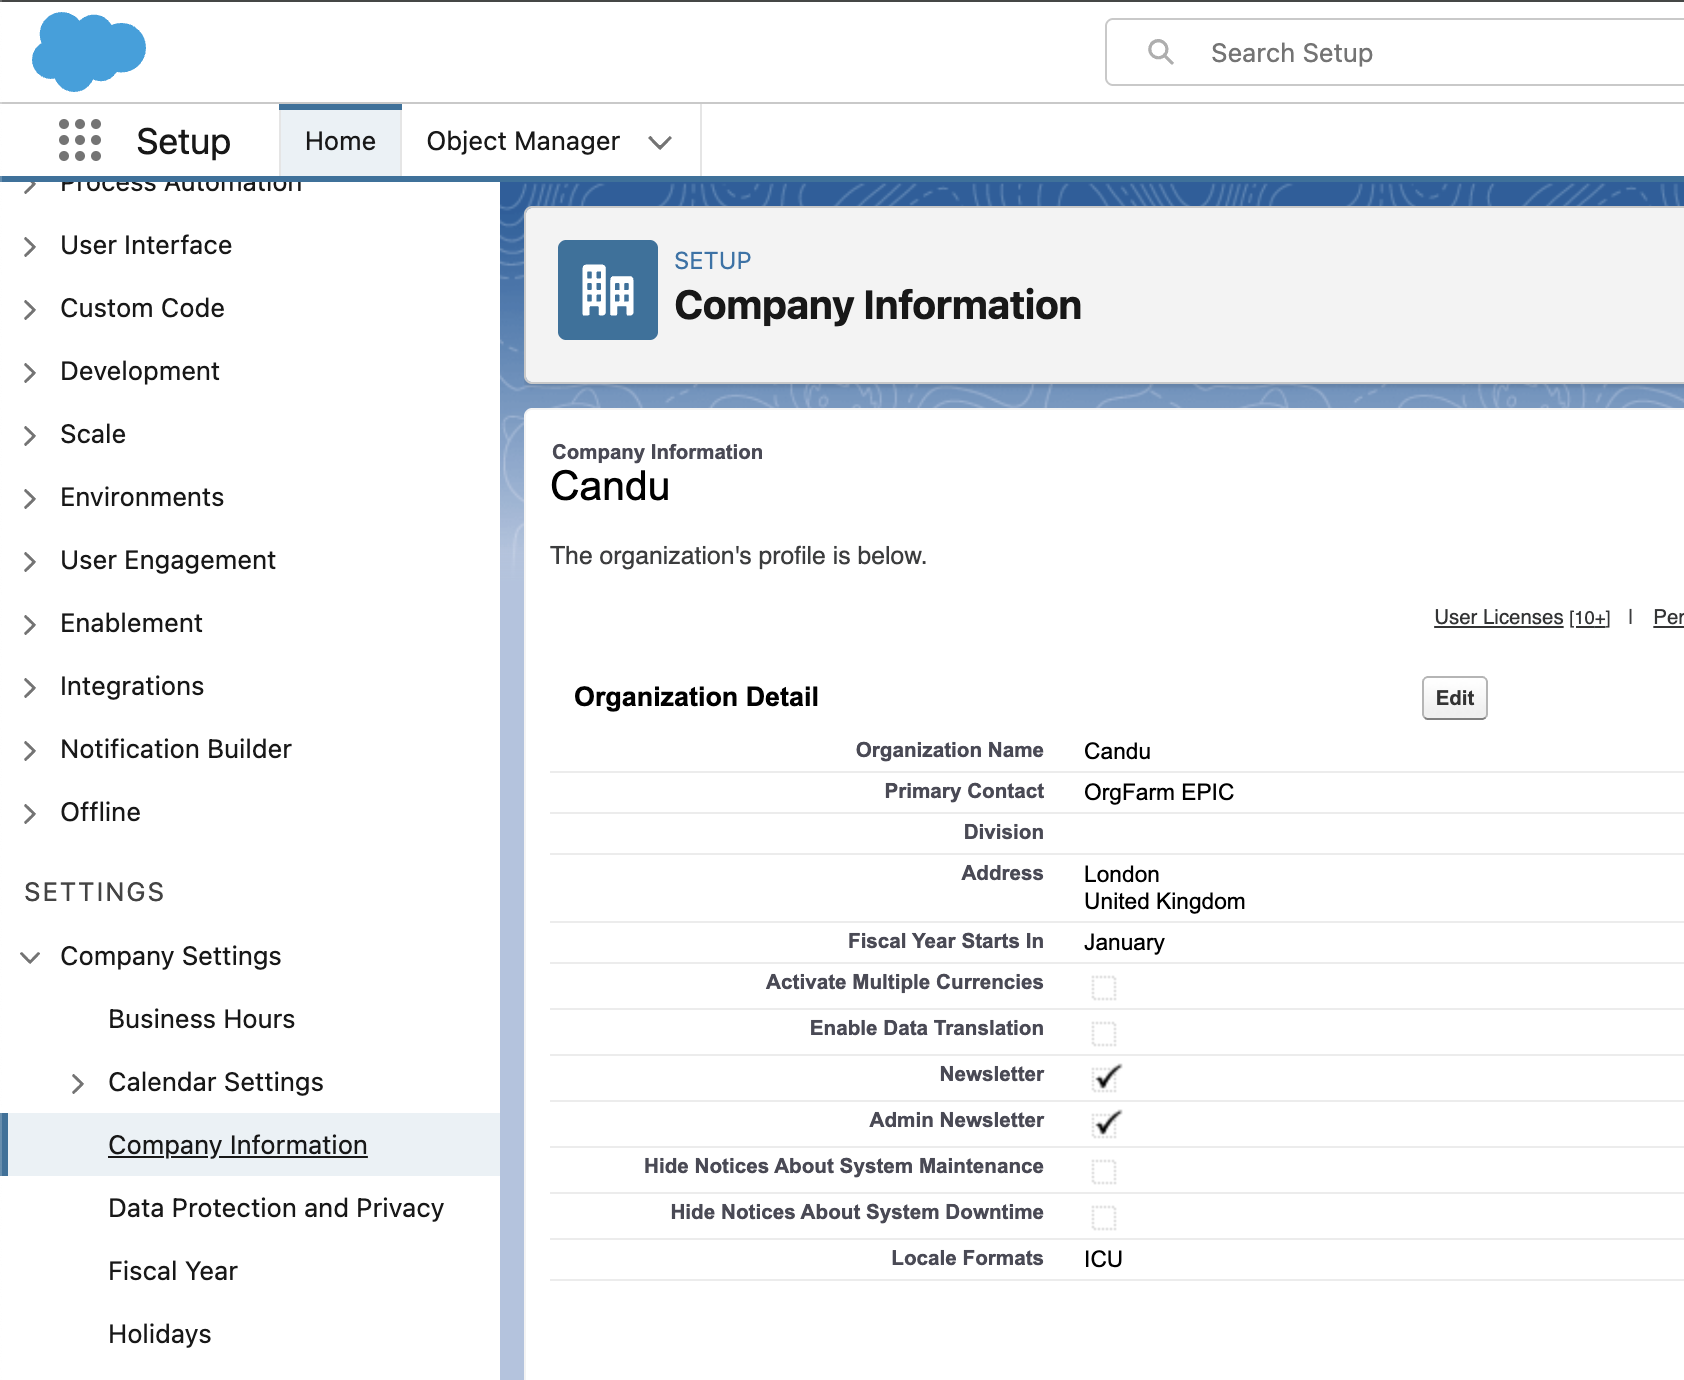
1. Confirm Company name
Candu will issue a signing certificate for use in the integration flow, for this we'll need to confirm the company name:
Organization Name - usually in Company Settings -> Company Information
2. Candu will issue a certificate
Based off the provided company name, Candu will generate a certificate and private key for use accessing the API. You'll upload the certificate in step 5.
Note: The certificate will be issued with the email engineering+{companyName}@candu.ai
3. Integration Profile setup
Create a new profile to be used for the integration
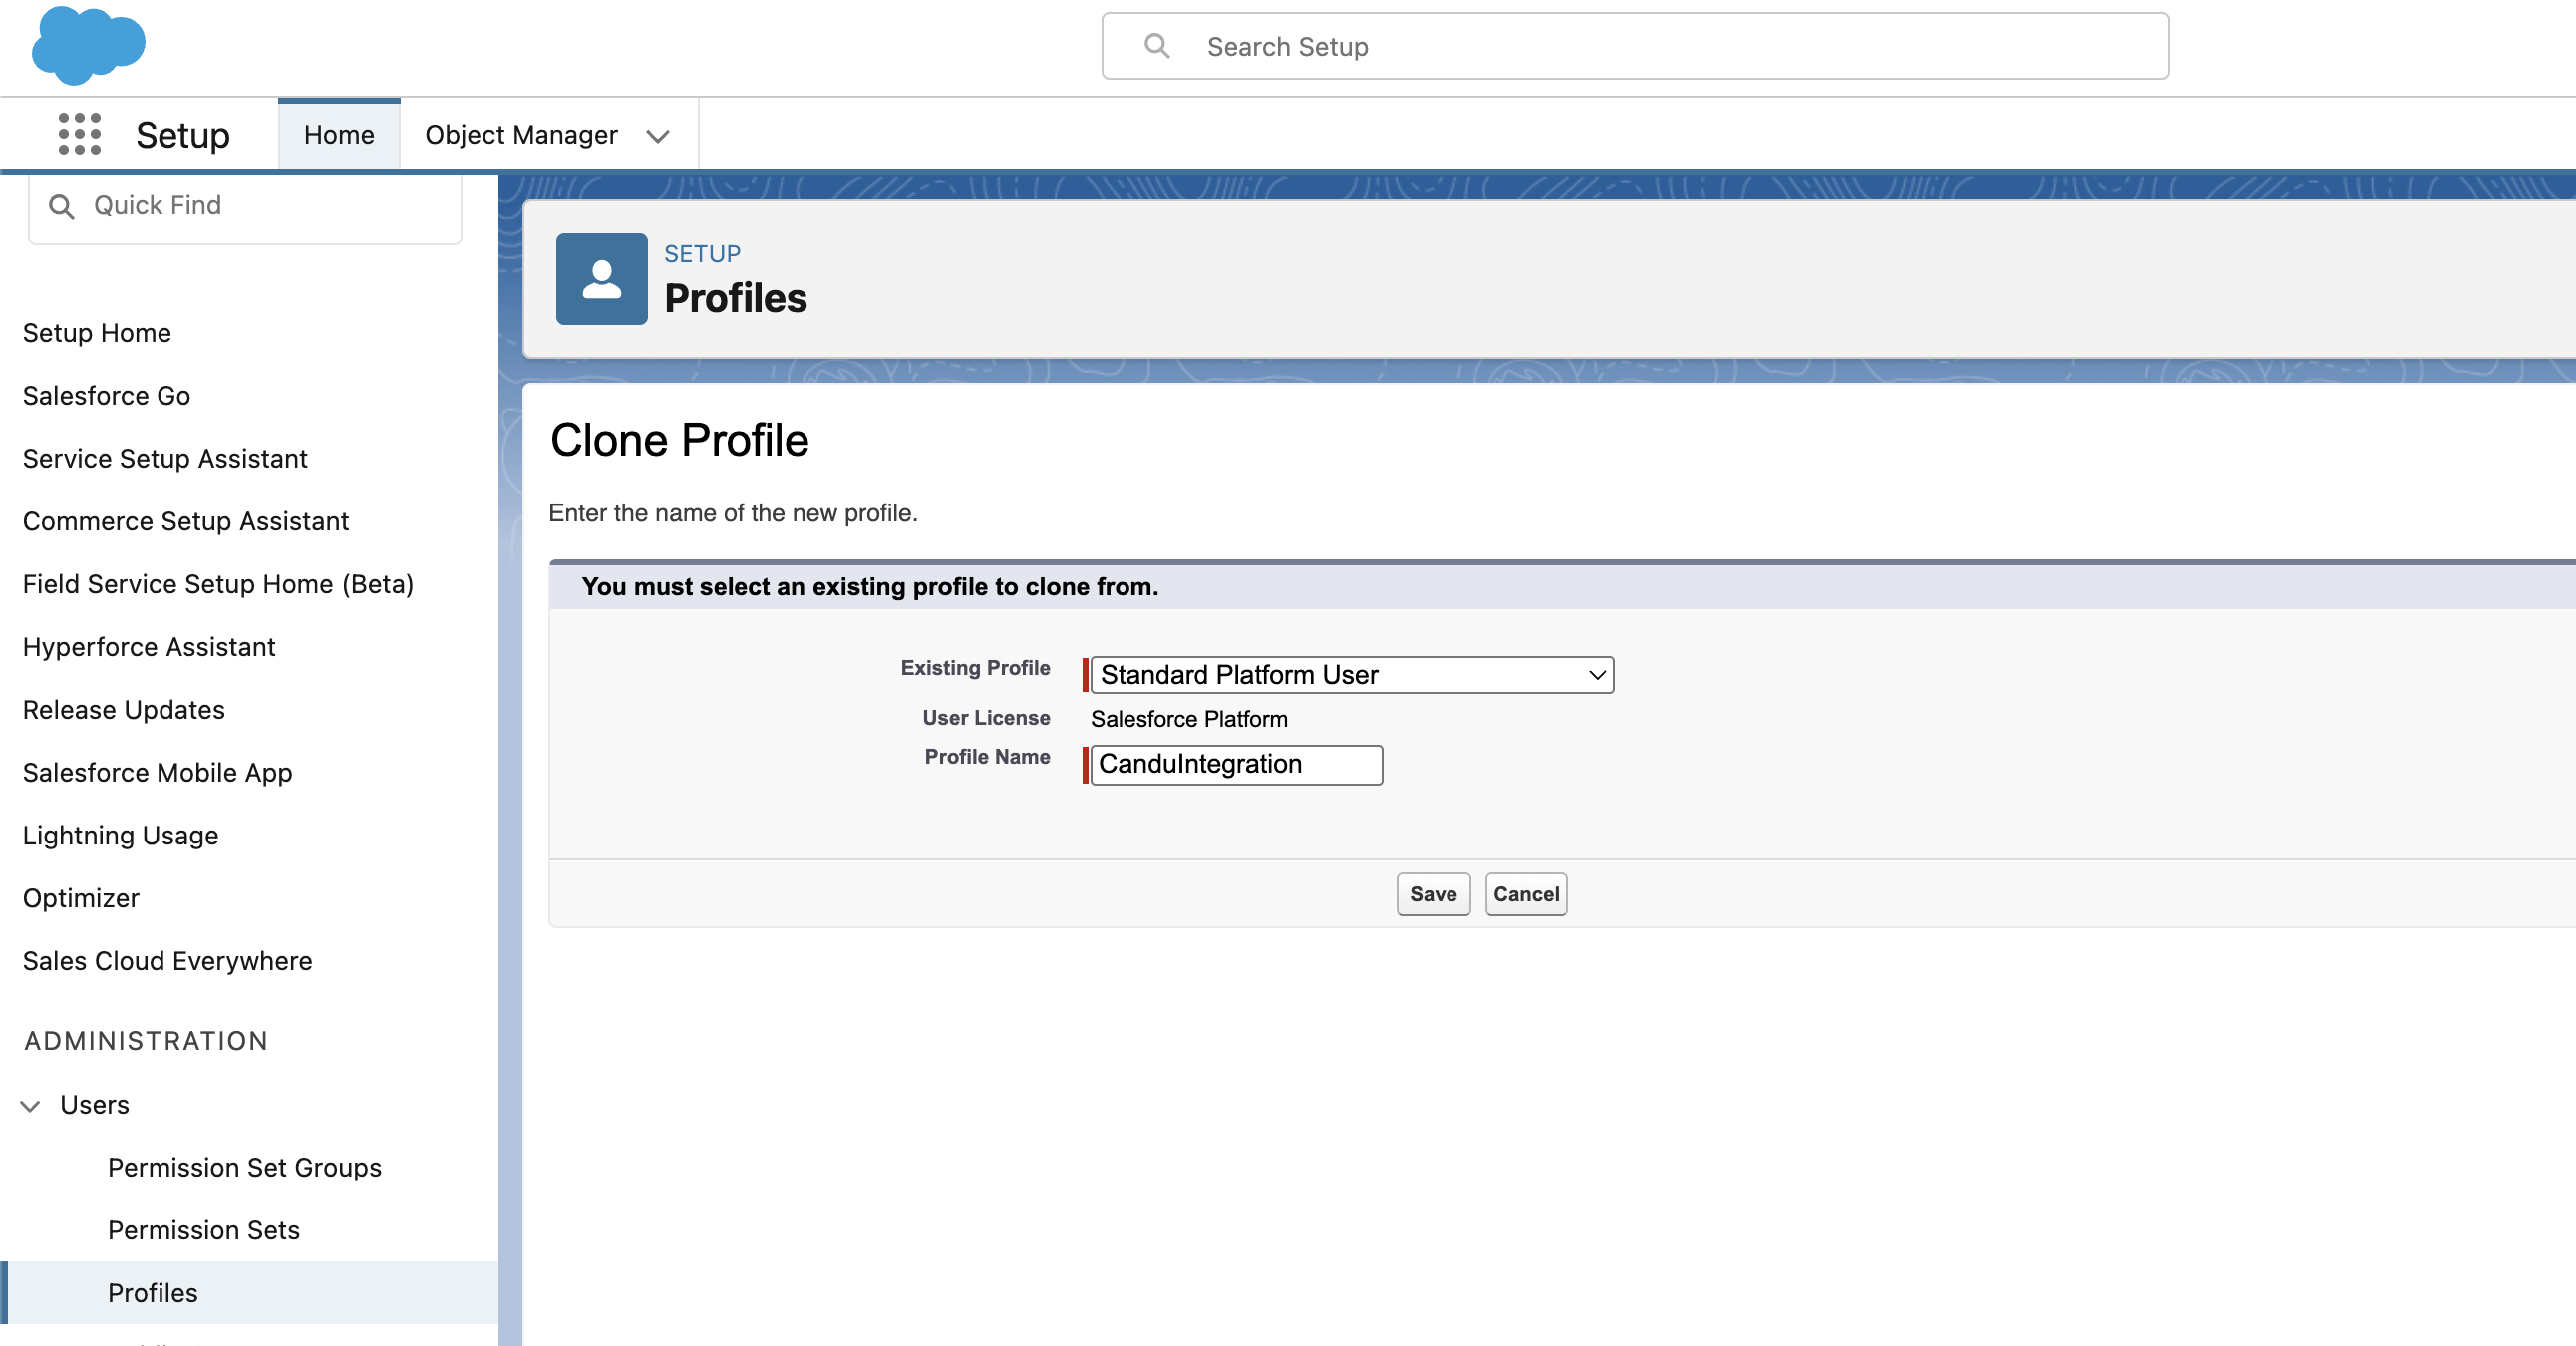
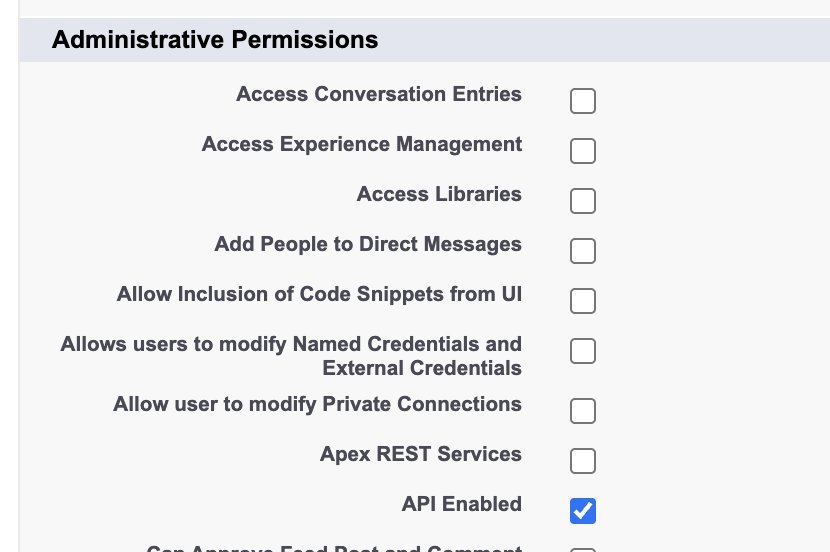
Ensure the created profile has the following permissions:
-
Administrative Permissions
- API Enabled
-
Standard Object Permissions
- Accounts: Read, View All Records, View All Fields
- Contacts: Read, View All Records, View All Fields


4. Integration User Setup
Create a Candu User, with email: engineering+{companyName}@candu.ai and associate the above Profile to this User.
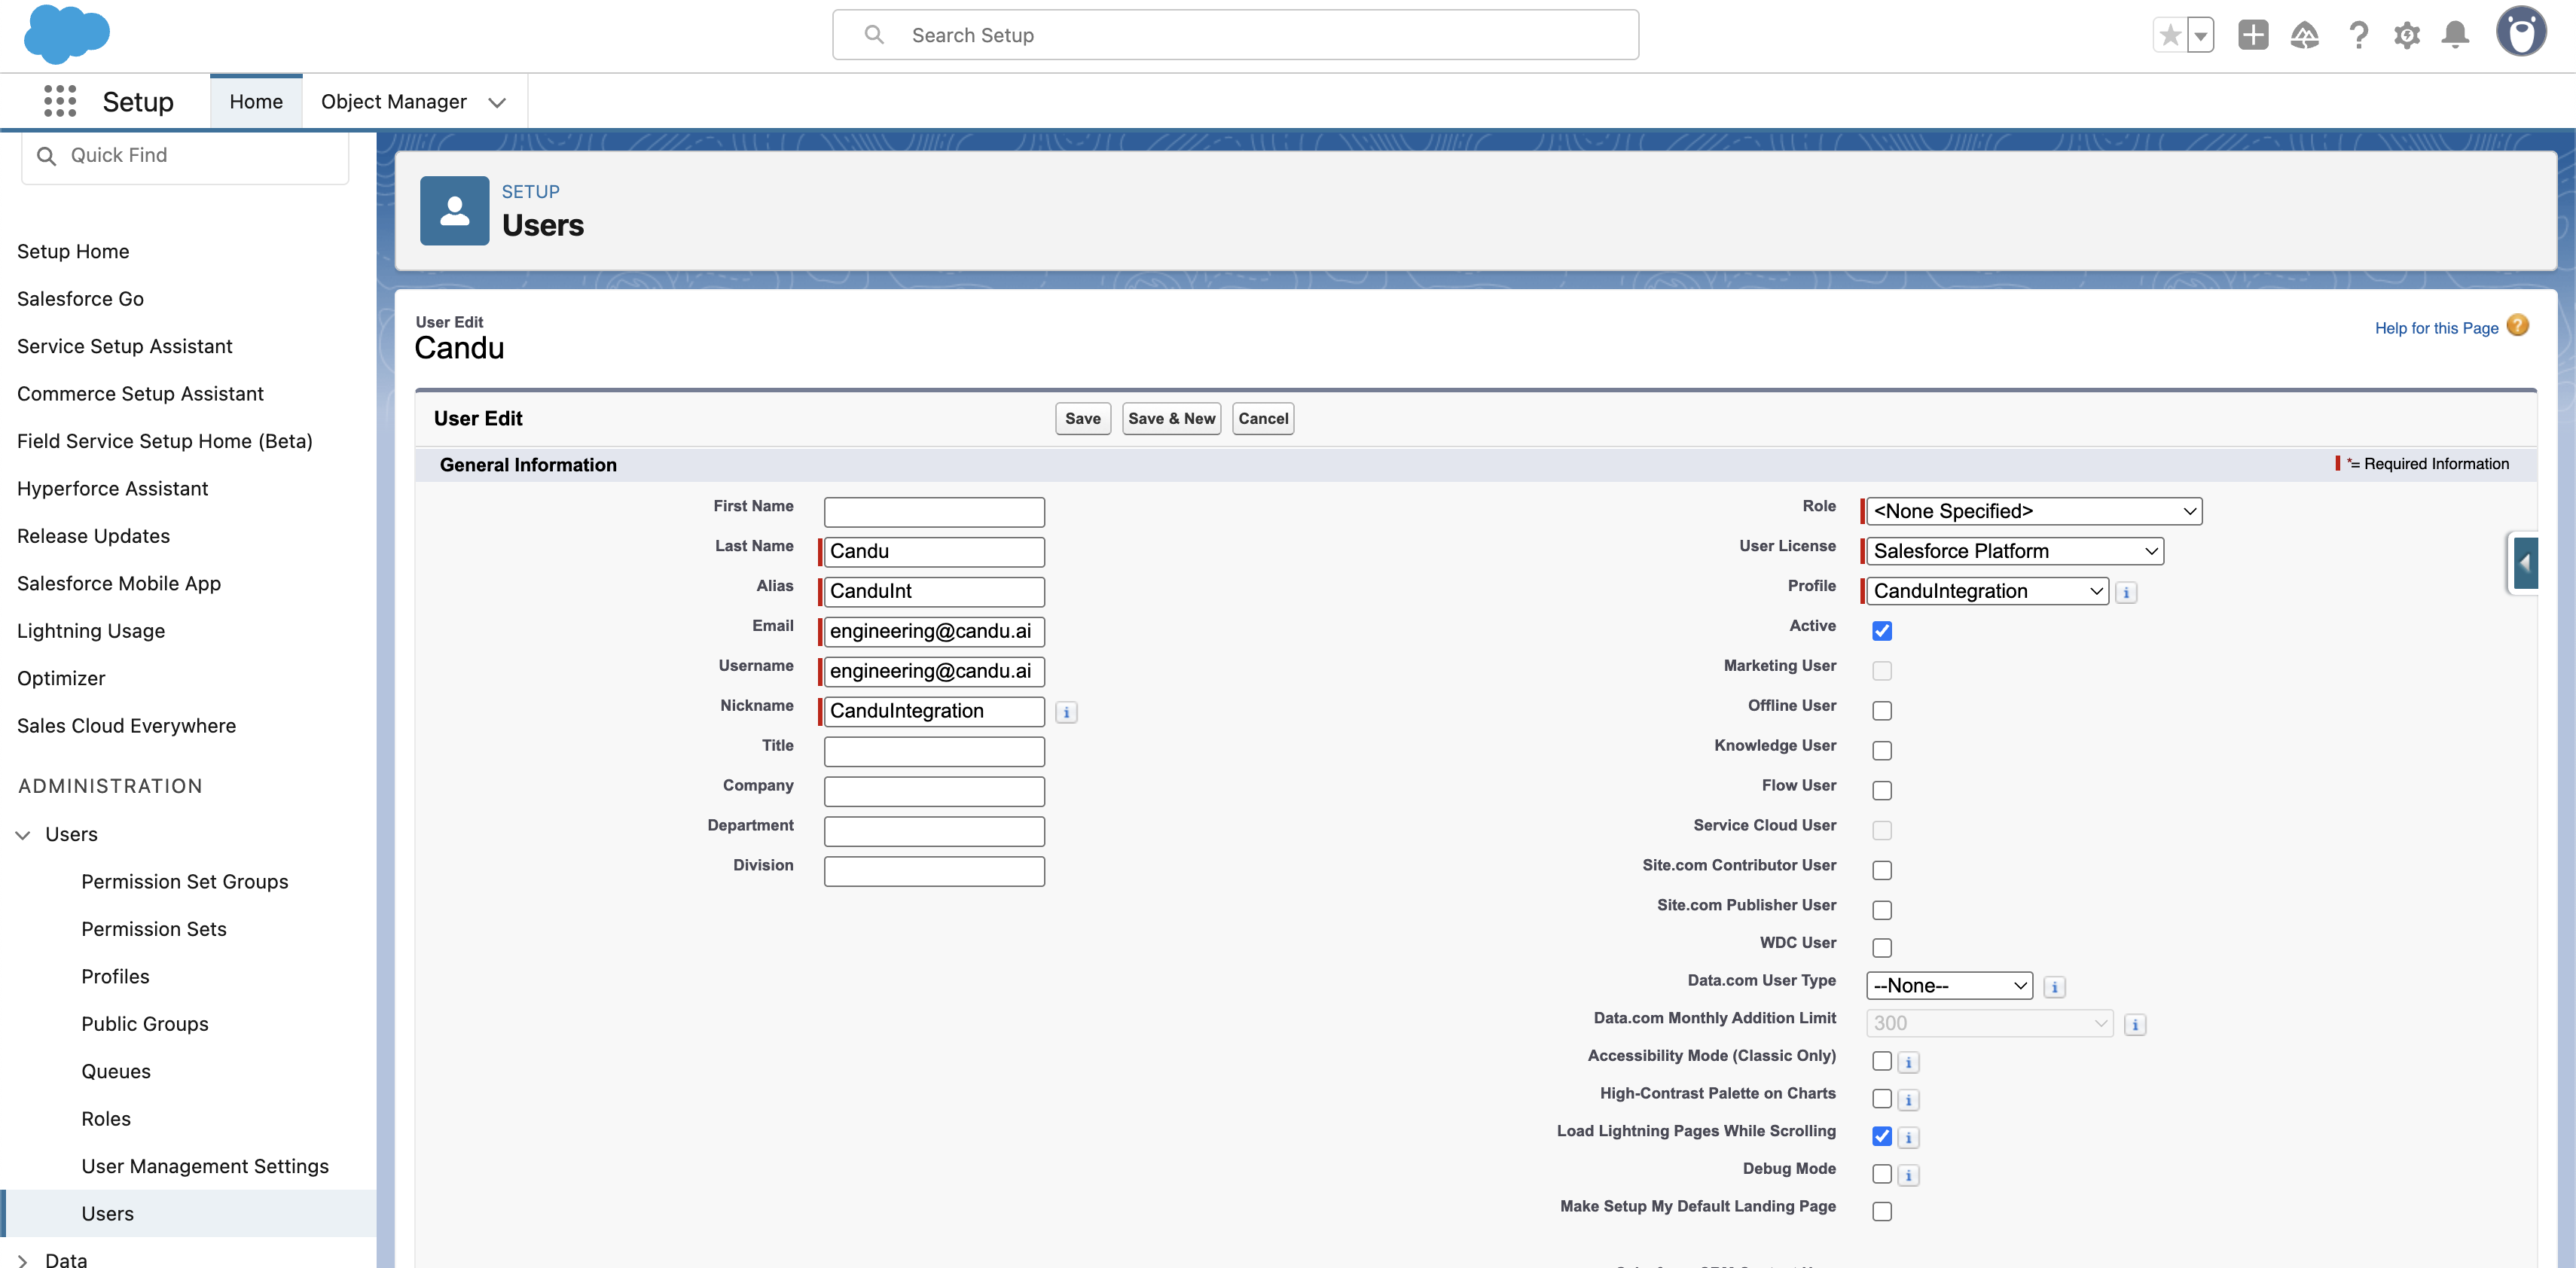
Note: this email must match the certificate generated in step 2.
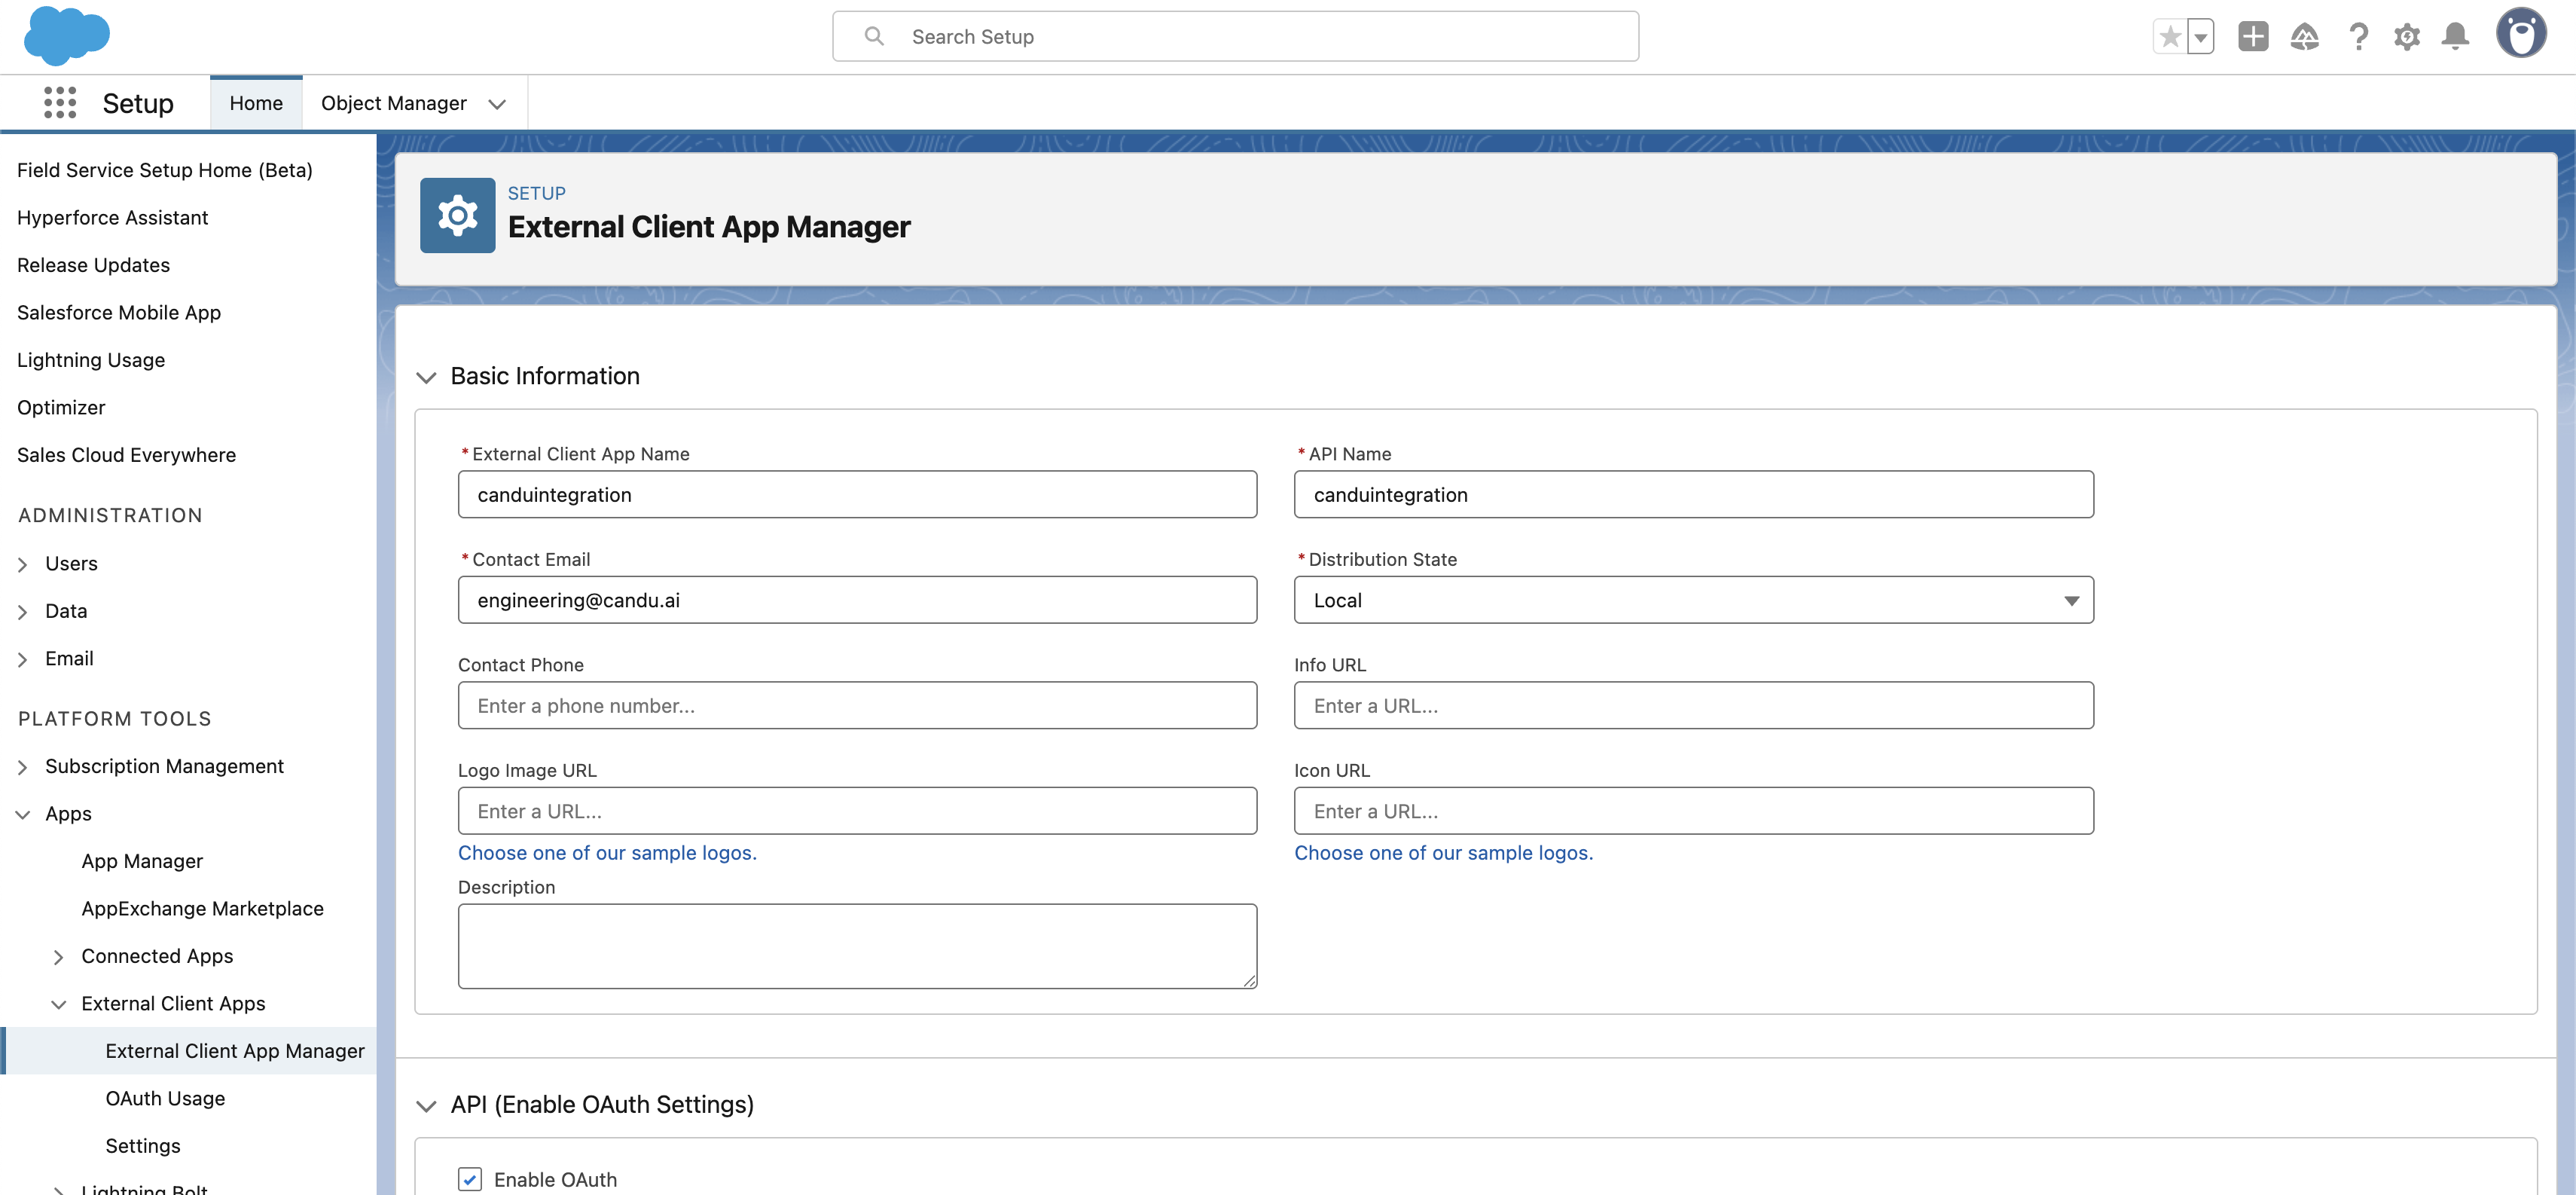
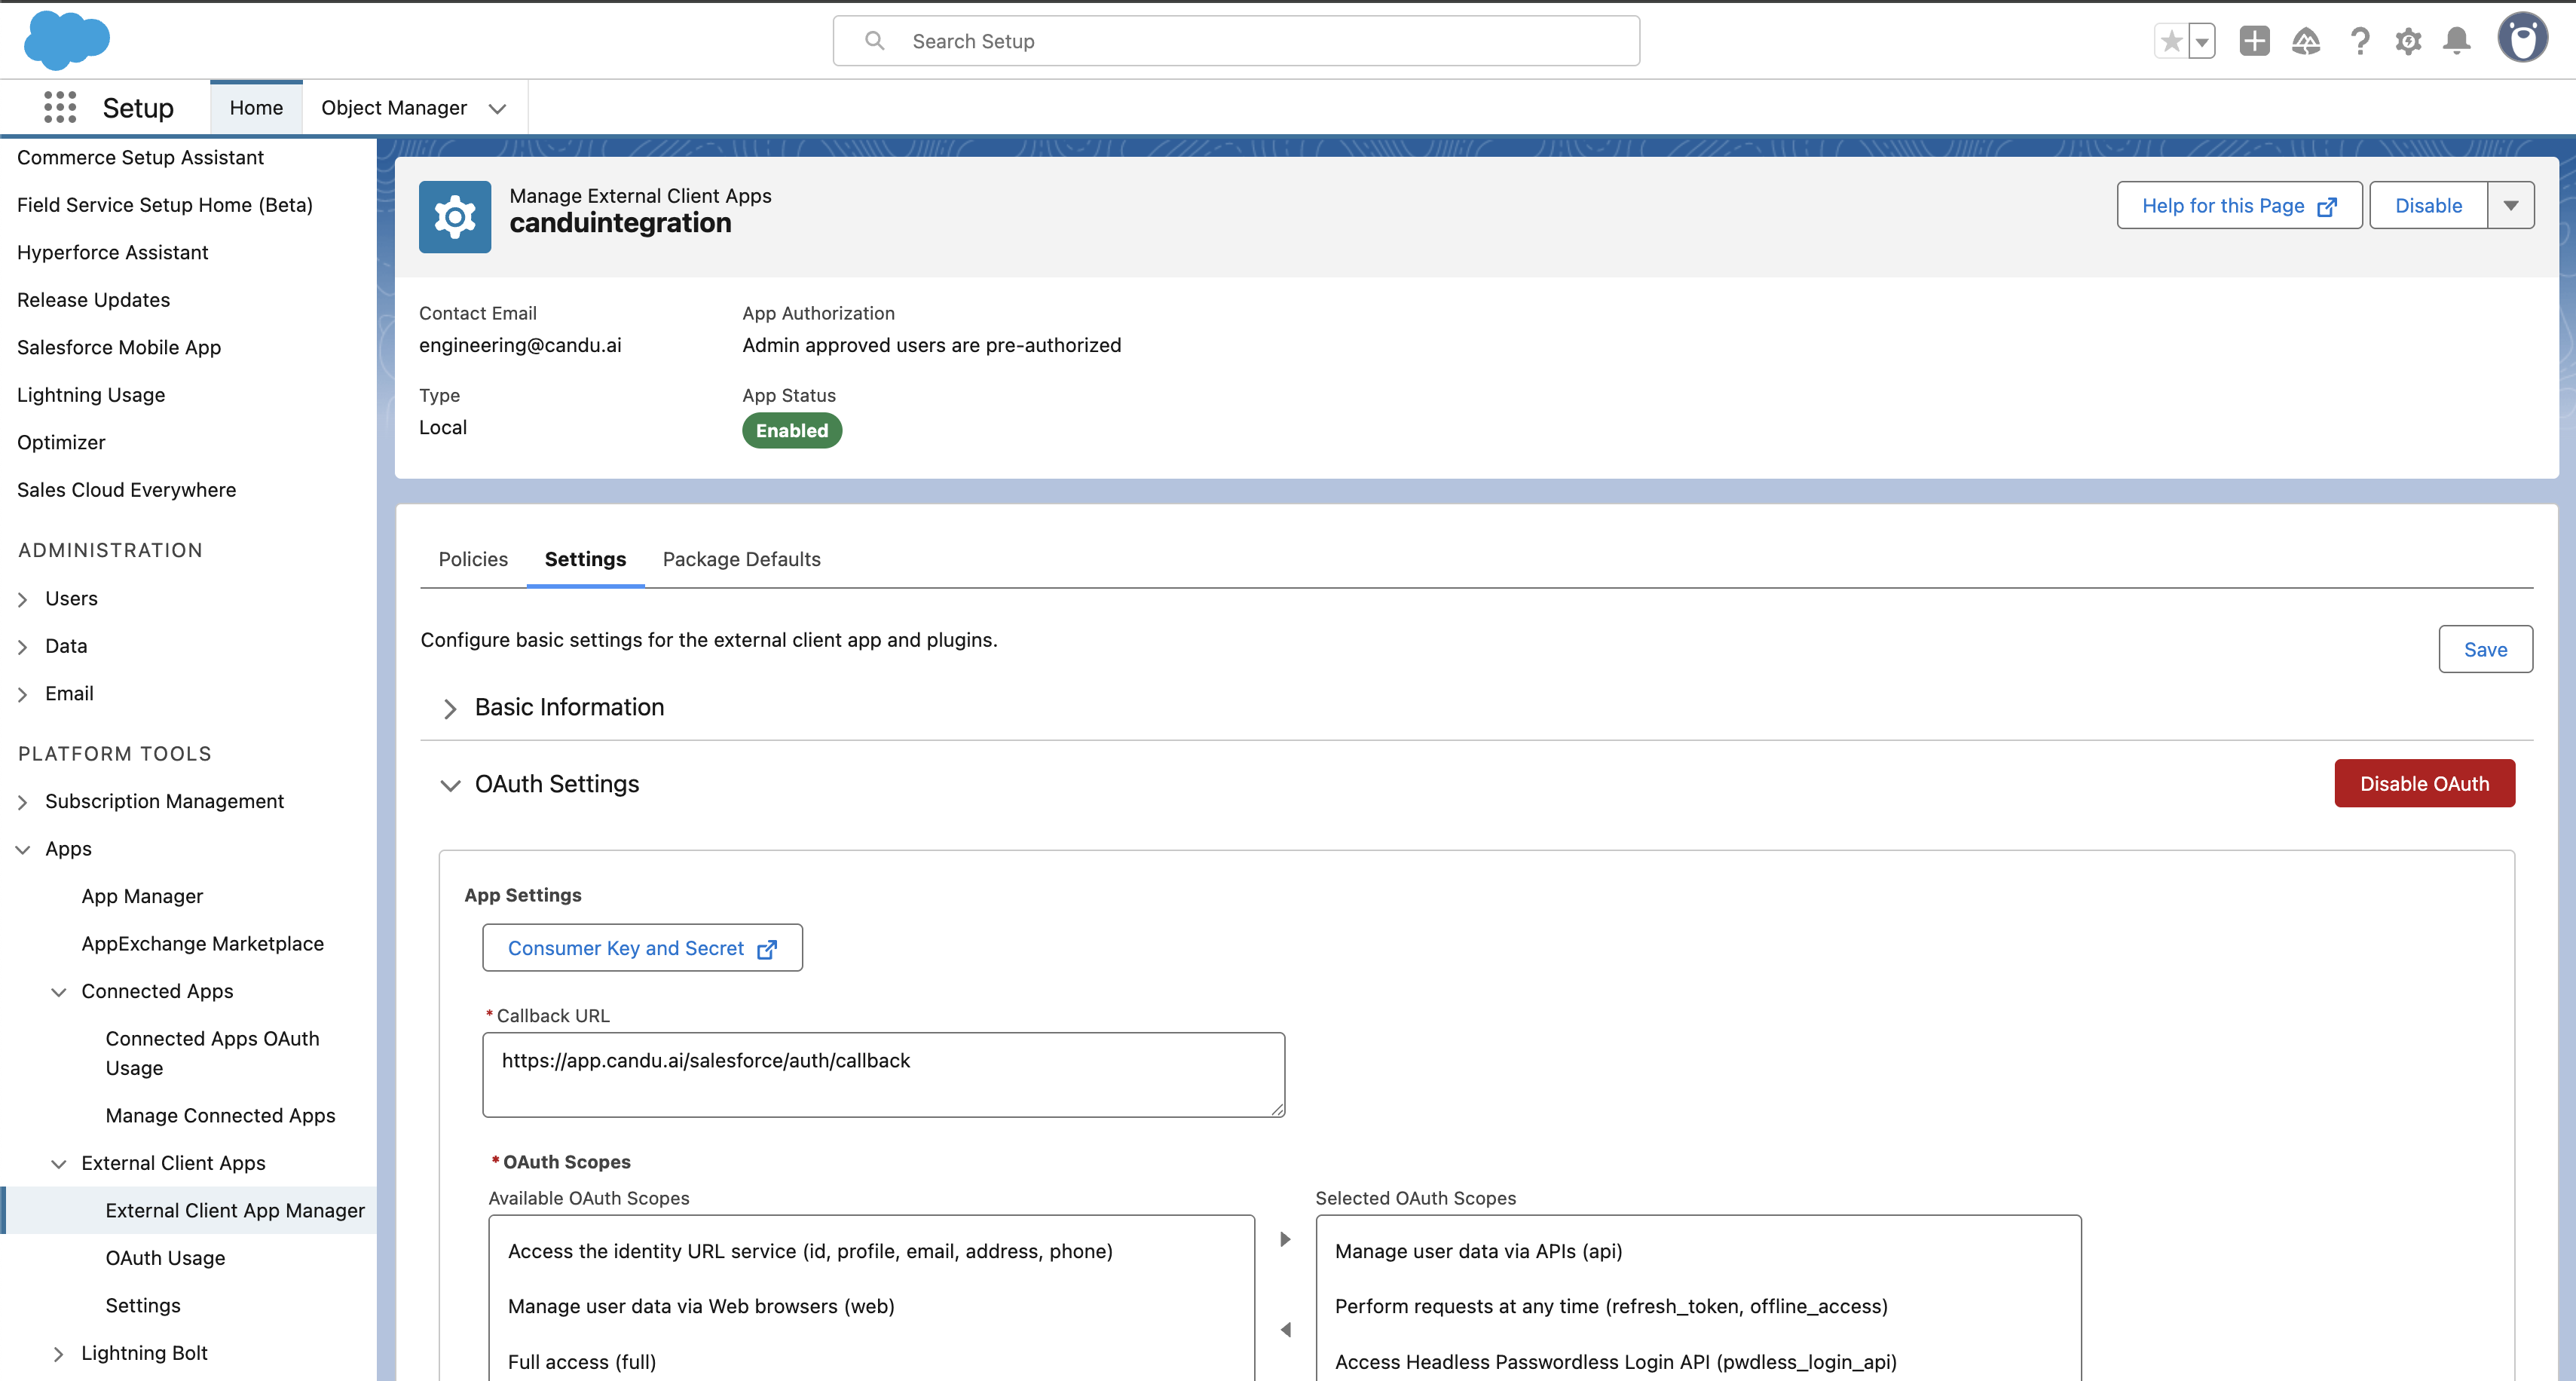
5. Client App Setup
Next we'll set up an External Client App - usually in Apps -> External Client Apps -> External Client App Manager
It should be configured as follows:
-
Basic Information
- Contact Email: [email protected]
-
API (Enable OAuth Settings)
- Enable OAuth
-
App Settings
-
Callback URL: https://app.candu.ai/salesforce/auth/callback
-
OAuth Scopes
- Access Headless Passwordless Login (pwdless_login_api)
- Manage user data via APIs (api)
- Perform requests at any time (refresh_token, offline_access)
-

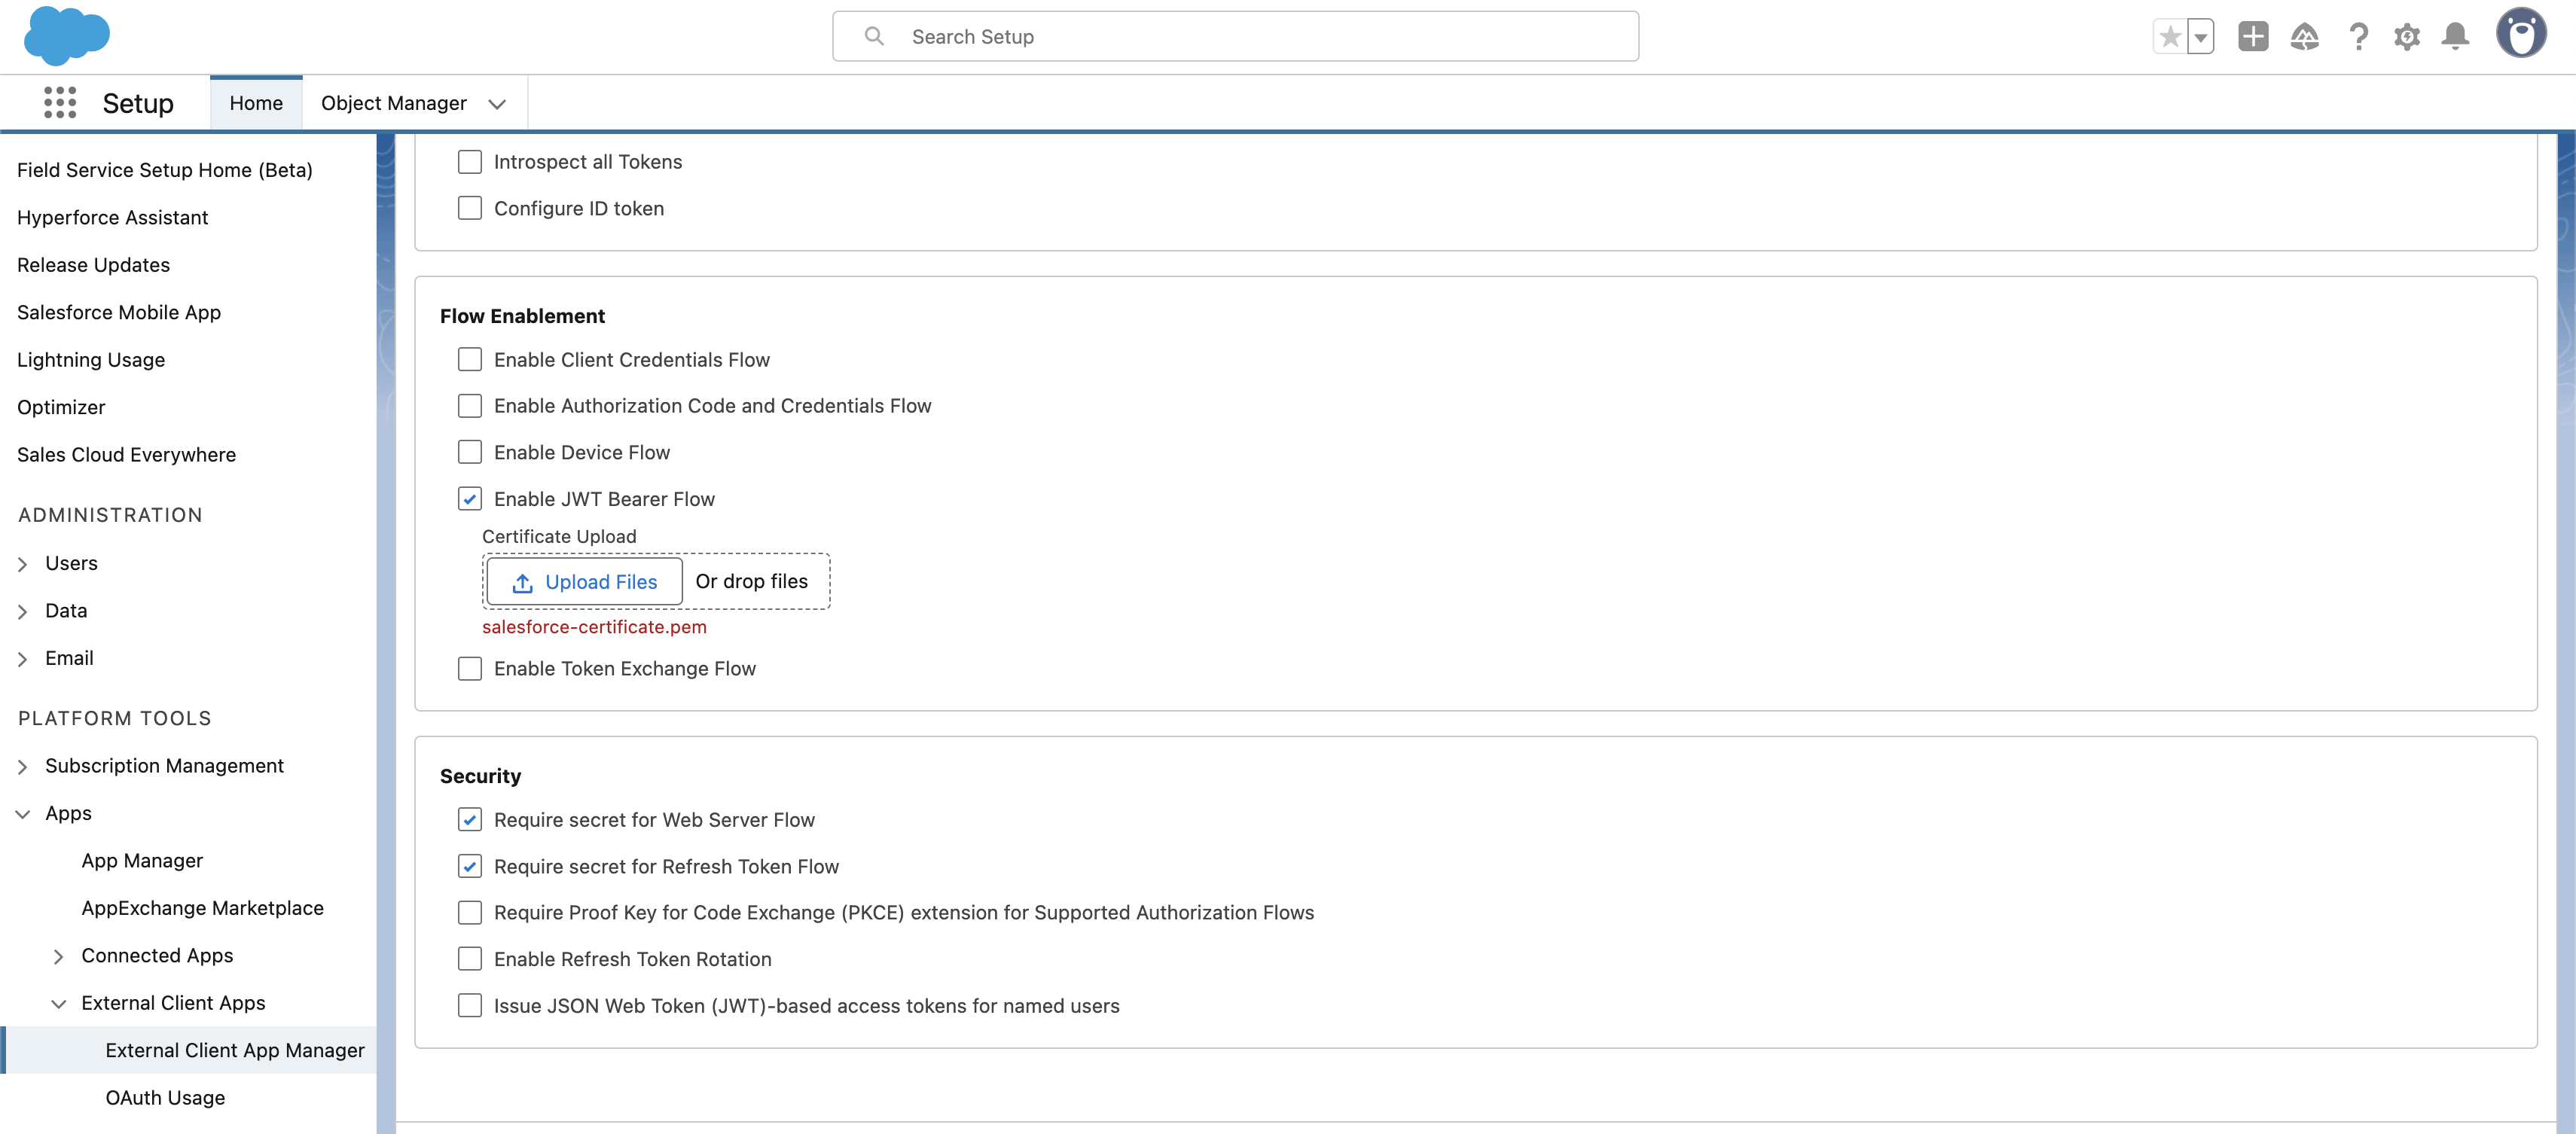
- Flow Enablement
- Enable JWT Bearer Flow
- Upload the Candu certificate
- Enable JWT Bearer Flow
- Security
- Check: Require secret for Web Server Flow
- Check: Require secret for Refresh Token Flow
- Uncheck: Require Proof Key for Code Exchange (PKCE) extension for Supported Authorization Flows
- We do not support PKCE at the moment
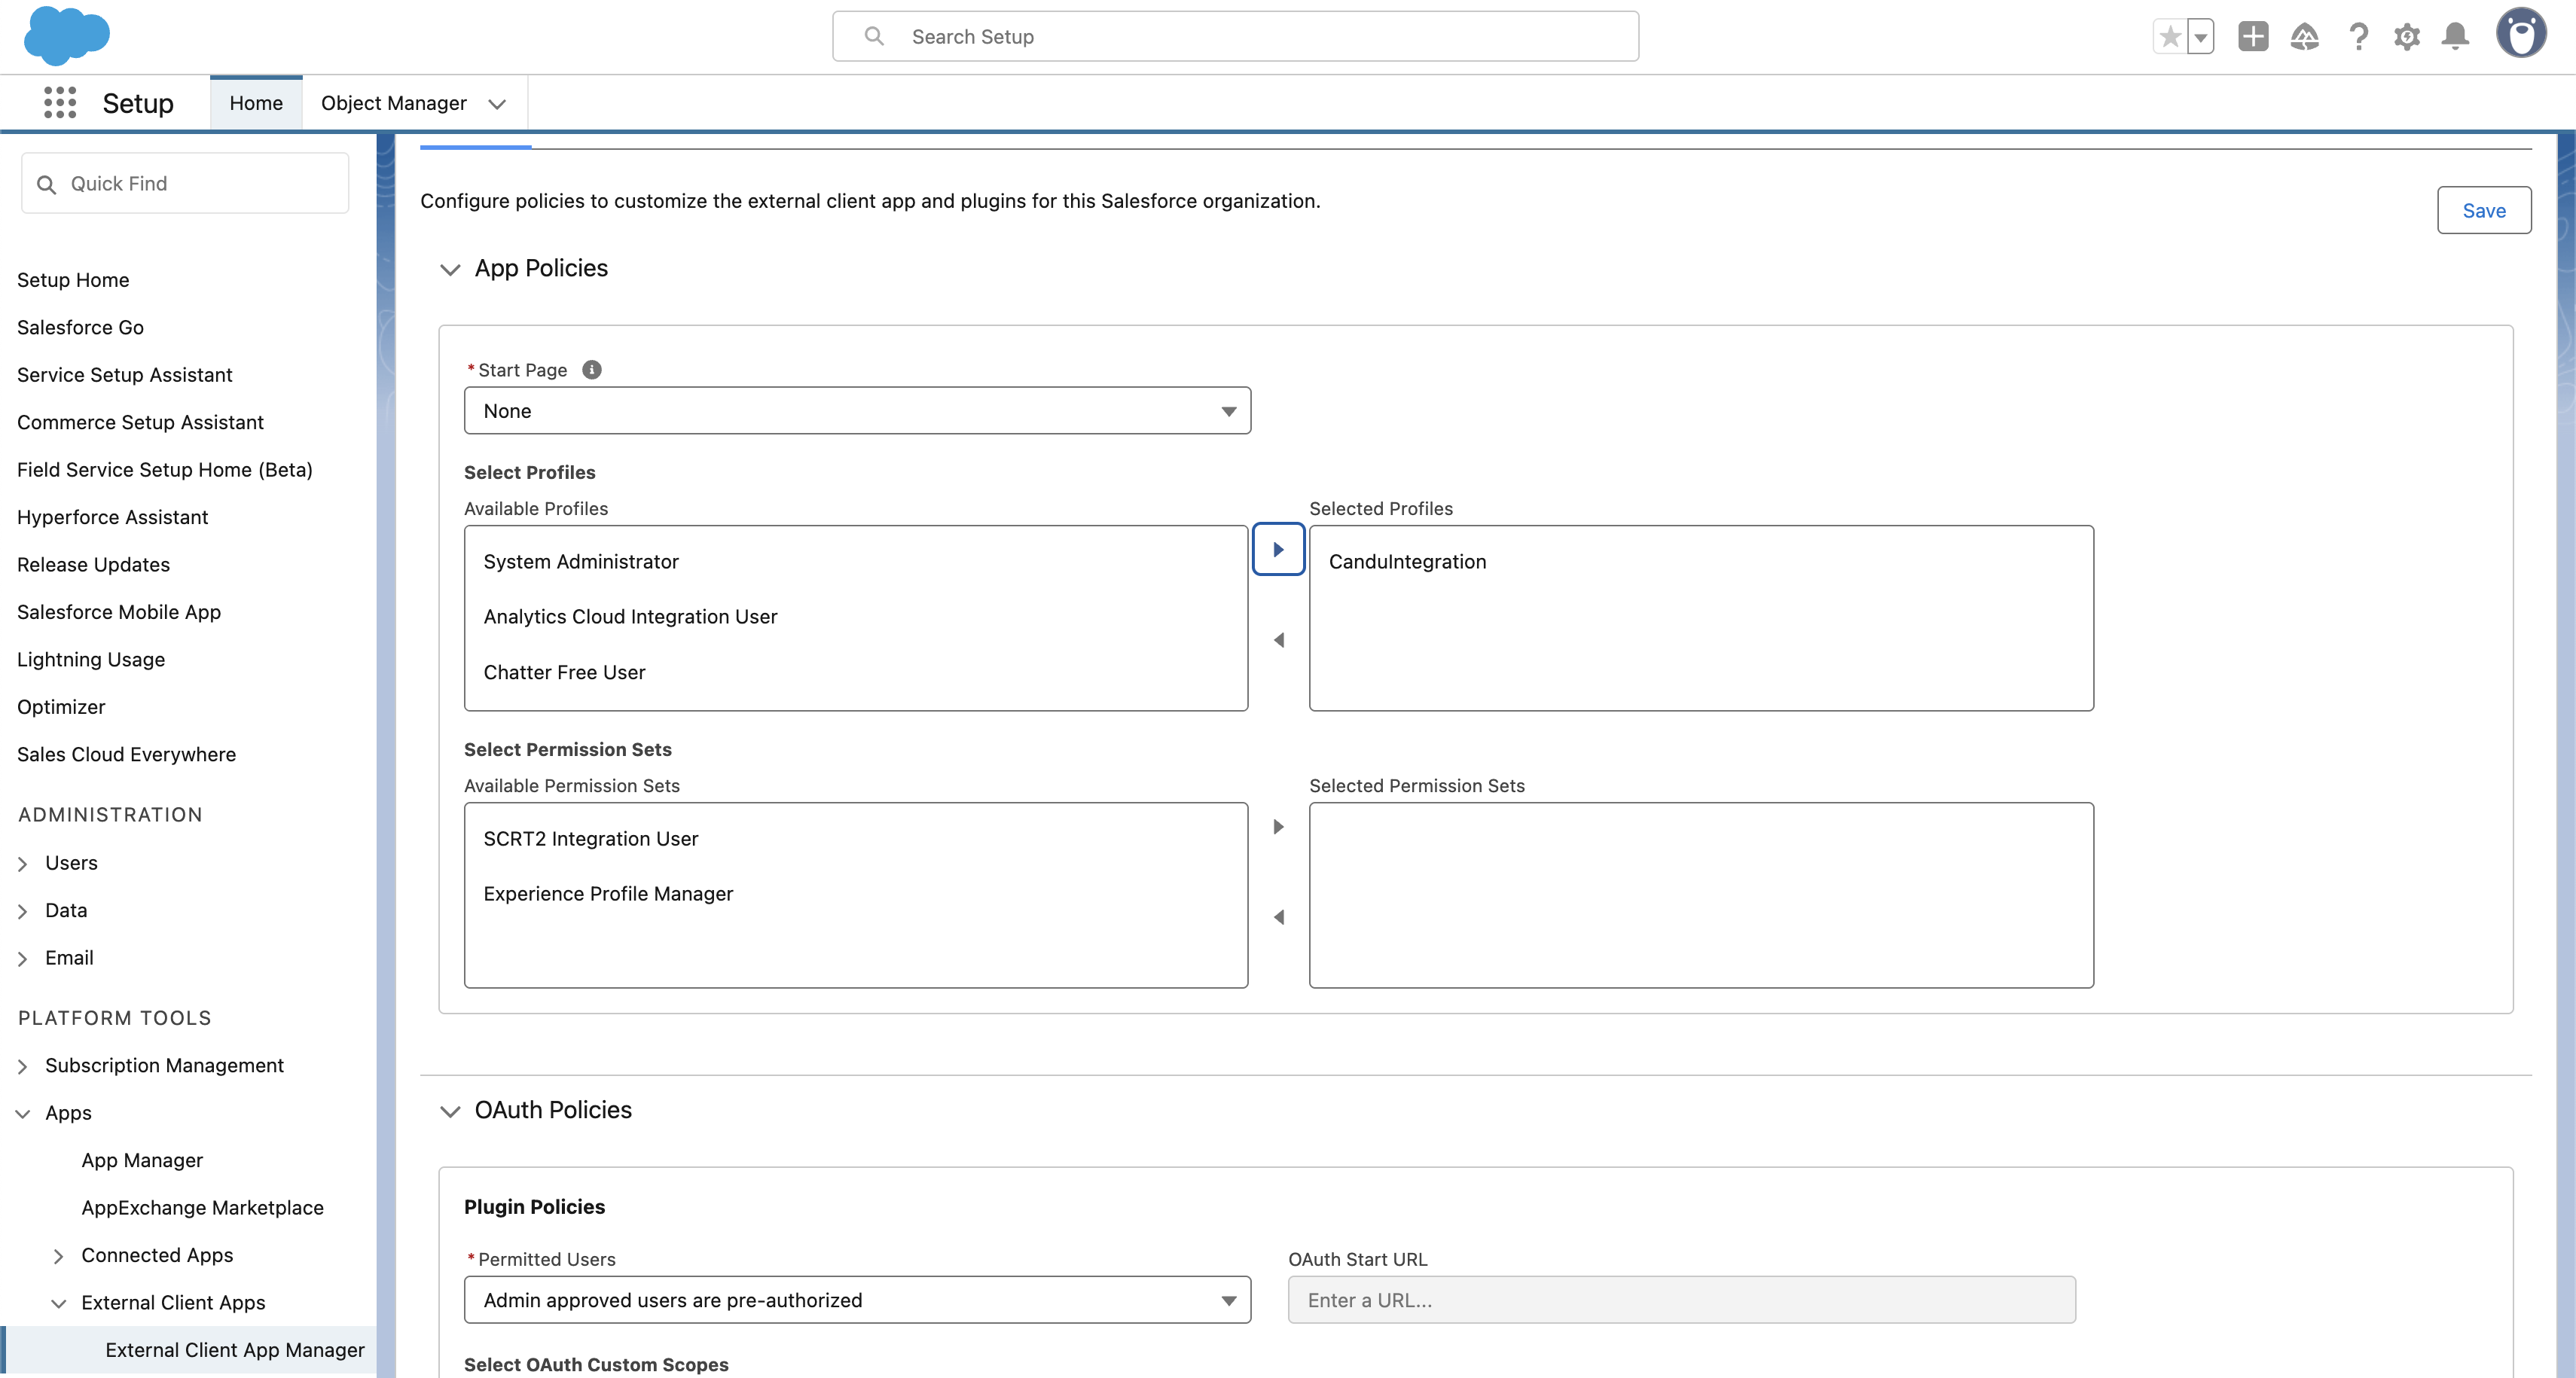
Back in External Client App Manager, click on the newly created App.
In Policies, click Edit (located on the right of the tab)
- Oauth Policies - Set Permitted Users: Admin approved users are pre-authorized
- App Policies Once Oauth Policies is set to pre-authorised, add the Profile we created earlier to Selected Profiles
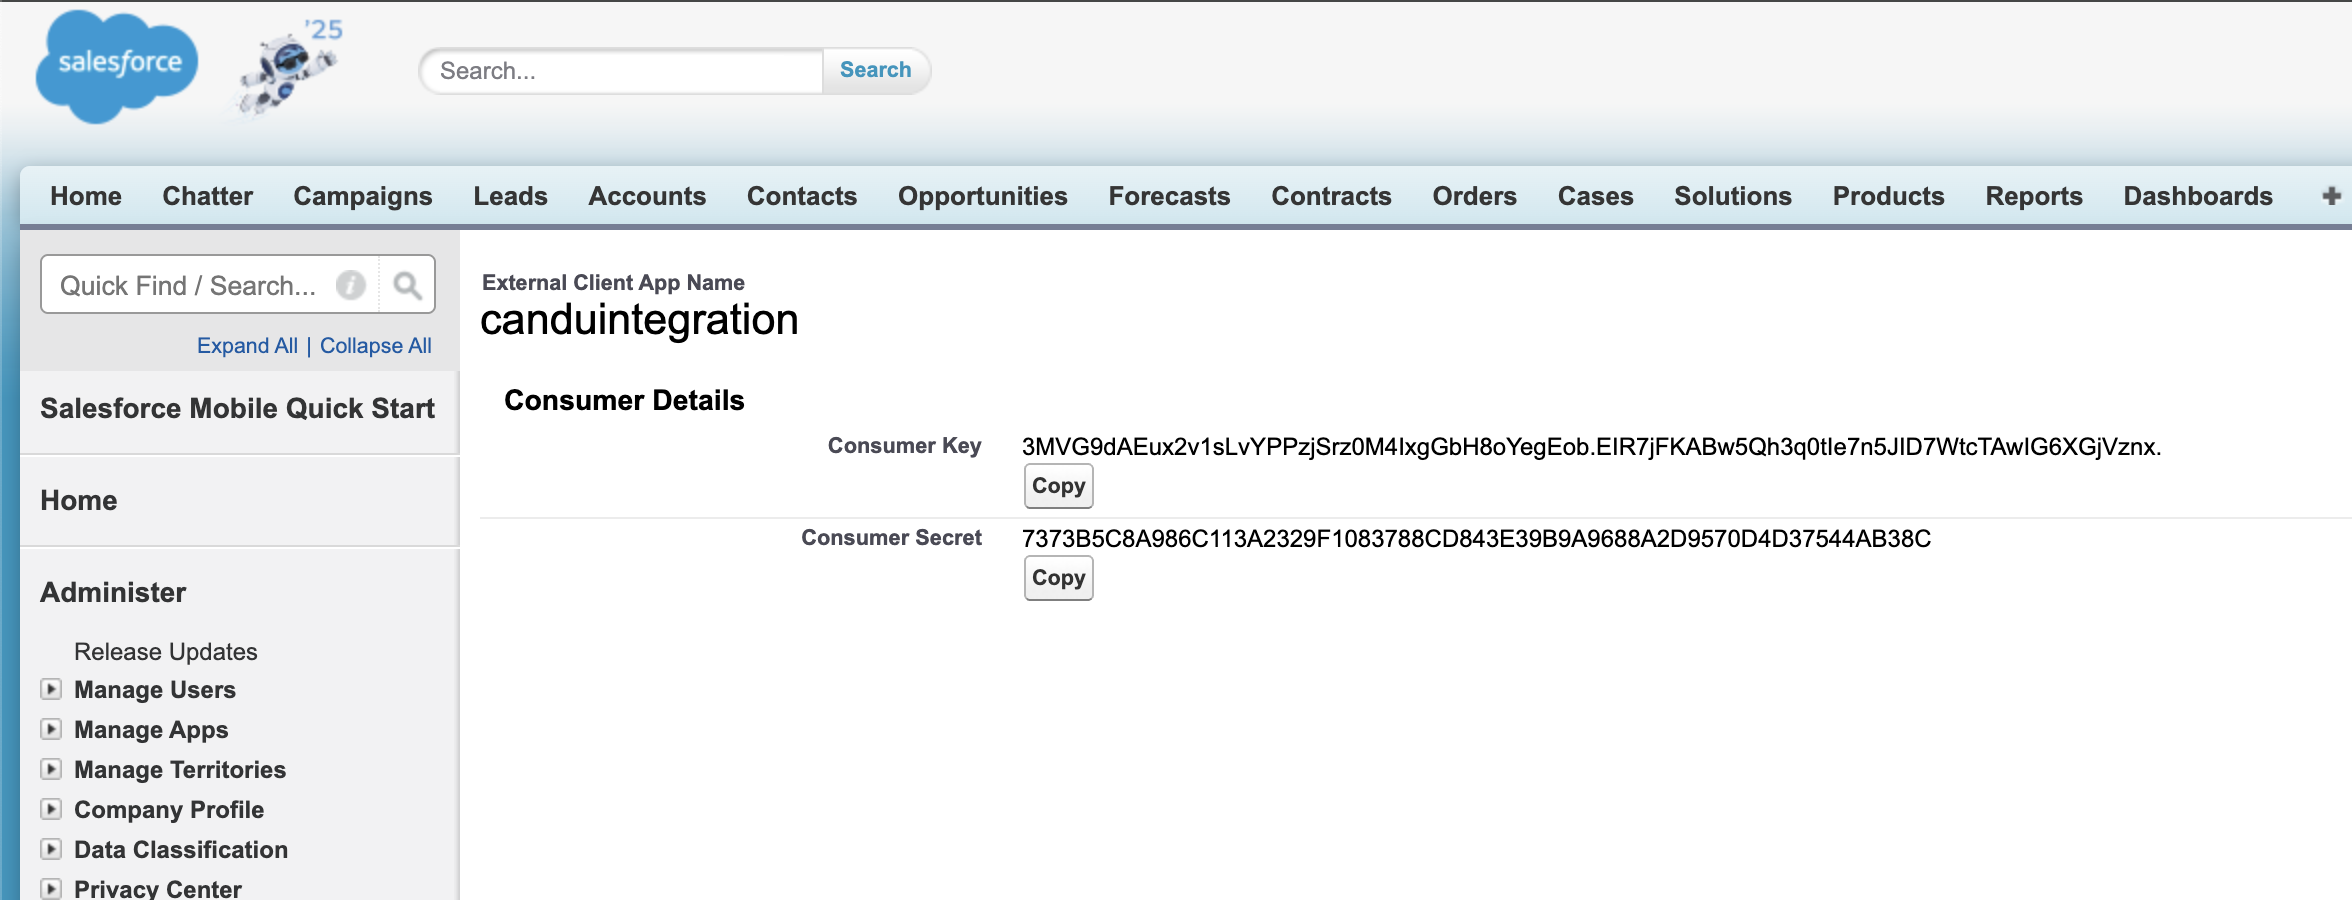
Next, within the newly created app, click Settings > Oauth Settings , then click Consumer Key and Secret
Take a note of the Consumer Key on the following screen. We do not require the Consumer Secret
6. Candu team sets up your sync
This step is not currently self-serve. The Candu team will set up your Workspace with the correct Salesforce endpoints.
For this, please provide us with the following information:
- Your Salesforce authentication host URL, for example:
- https://login.salesforce.com - usually it's this for cloud managed instances
- Your Salesforce token and query URLs, for example:
- The Consumer Key from step 5
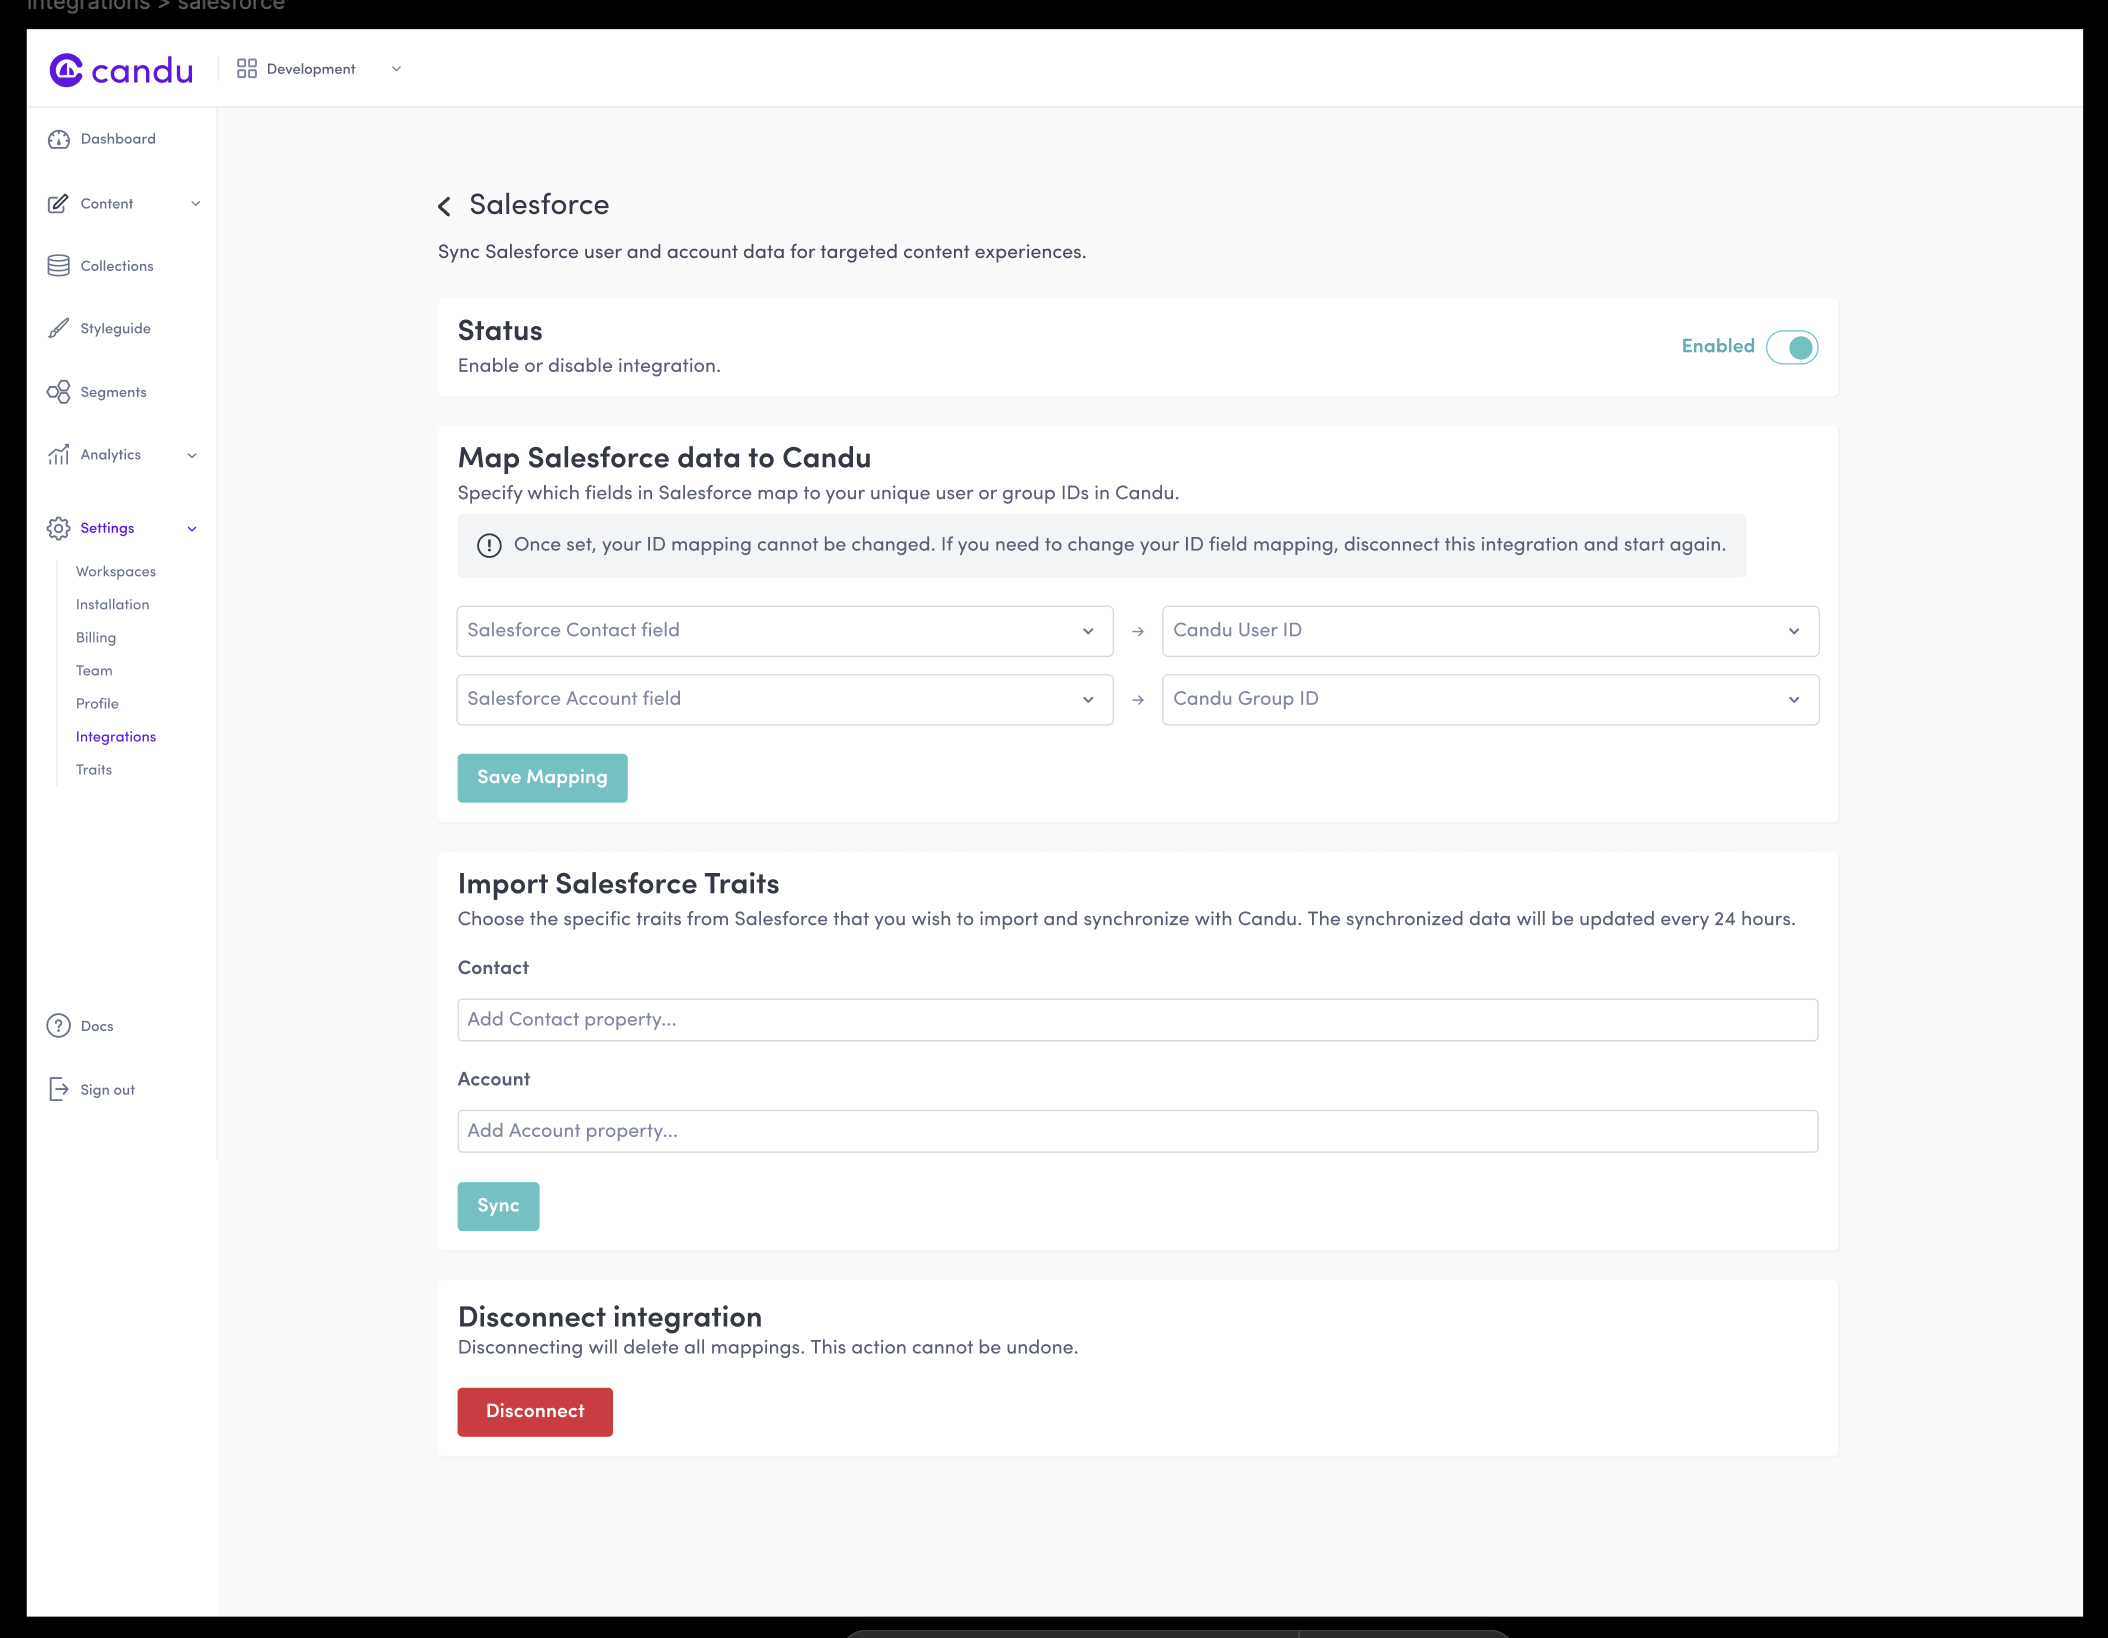
7. Confirm Mapped Fields and Enable
Once initial set up is performed, you'll be able to manage your integration via the Candu dashboard.
- Configure mapping IDs for contacts and accounts.
- Set up traits you'd like to import
- Confirm details enable